How to Generate Private Key from a CSR Certificate?

Your Step-by-Step Guide to Generating a Private Key from a Certificate Signing Request (CSR)
Though people might know about the significance of using SSL certificates on their website owner, they might not be acquainted with the idea that one has to a Private Key from a Certificate Signing Request (CSR).
According to a 2022 stat, 85% of organizations suffered from a successful cyberattack in 2021. We are sure you don’t want to be yet another victim of these attacks. One of the measures you can take up is incorporating a Secure Socket Layer/Transport layer security (SSL/TLS) certificate.
So let us learn how to generate it. But before that, let’s learn what Certificate Signing Request (CSR) and private keys are.
What are CSR and Private Keys, and Where to Use Them on web servers?
A CSR is a request for a certificate authority (CA) to issue a digital certificate. A CSR contains information about the applicant, such as the domain name, company name, and the public key of the applicant organization. The CA uses the information in the CSR to create the certificate, which includes the digital signature of the CA and the public key of the applicant.
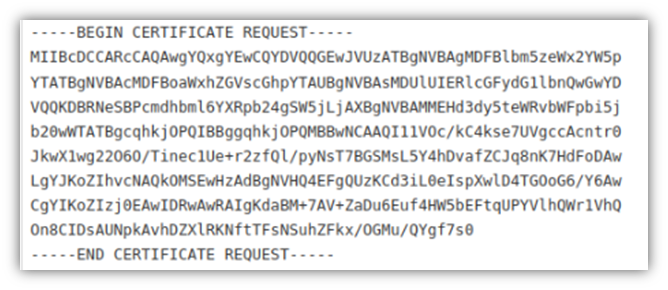
A Certificate Signing Request (CSR) Example
A private key is a secret key that is used to decrypt data that has been encrypted with the corresponding public key. When we talk in terms of SSL/TLS certificates, the private key is used to decrypt data that has been encrypted with the certificate’s public key. Moreover, for signing digital documents, such as email messages, the private key is used to prove that the owner of the private key created them.
A private key is a long string of letters and numbers that is used to encrypt and decrypt data. It is typically represented as a hexadecimal string, a series of digits and letters (0-9 and A-F) representing a number in base 16. A variety of cryptographic systems, such as public-key cryptography and password-based authentication, use private keys. In public-key cryptography, a private key is used to decrypt data that has been encrypted with a corresponding public key.
The CSR and private key are important for establishing trust and secure online communication. The CSR is used to request a certificate from a CA, which is used to establish the identity of a website or other entity. The private key decrypts data using the corresponding public key, ensuring that only the intended recipient can access it.
So how does one get them? CSR Generator tool is a useful SSL tool that is widely used to generate private key from CSR. So let’s find out how.
How to Get a CSR and a Private Key?
To obtain an SSL/TLS certificate for your website, you should generate a Certificate Signing Request (CSR) and private key, which can be done using several methods. Some of the most common methods include:
- CSR Generator tool
- MMC Console
- OpenSSL command-line utility
- Using a certificate authority’s website
The choice of which method to use will depend on your specific needs and preferences. Some methods may be more convenient or easier to use than others, depending on your level of technical expertise and the resources available to you.
Now, let us see how each method generates CSR and private keys.
What are the Methods of Generating Private Keys from Certificate Signing Request?
First, let us see how to generate private keys and CSR using the CSR Generator tool.
Using the CSR Generator tool
A Certificate Signing Request (CSR) and a private key can be generated using a CSR generator tool, a software application allowing you to create a CSR and a private key for an SSL/TLS certificate.
There are several reasons why you might want to use a CSR generator tool:
- Efficiency: Manually generating a CSR and private key can be time-consuming and require a certain level of technical expertise. A CSR generator tool can streamline the process and allow you to generate these items quickly and easily.
- Accuracy: A CSR generator tool can help ensure that the information in the CSR is accurate and complete, which is important for the certificate issuance process.
- Security: A browser-based CSR generator tool can keep your private key secure by generating it locally in your browser rather than on a server. This can help prevent unauthorized access to the key.
- Compatibility: A CSR generator tool can also ensure that the CSR and private key are compatible with the certificate authority (CA) you are using to request your SSL/TLS certificate.
In summary, a CSR generator tool can save you time and effort, help ensure accuracy and security, and ensure compatibility with your CA, making it a useful tool for generating the necessary components for obtaining an SSL/TLS certificate.
Steps to Use CSR Generator Tool
Step-1: Download and install the CSR generator tool on your computer.
Step-2: Open the CSR generator tool.
Step-3: Follow the prompts to enter the required information, including the domain name for which you want to generate the CSR and the details of your organization (e.g., name, address, and contact information).
Step-3: Select the type of SSL/TLS certificate you want to request (e.g., single domain, wildcard, or multi-domain).
Step-4: Select the encryption algorithm and key size for the private key.
Step-5: Click on the ‘Generate’ button to create the CSR and private key.
Step-6: Save the CSR and private key to a secure location on your computer.
Remember that the specific steps and options may vary depending on the CSR generator tool you use. If you encounter any issues or have any questions, consulting the documentation or support resources for the tool or your certificate authority may be helpful.
Using Windows MMC Console
There are a few reasons why you might choose to use the Microsoft Management Console (MMC) to generate a Certificate Signing Request (CSR) and private key:
- Convenience: The MMC is a built-in tool in Windows, so it is easily accessible and does not require additional software installation.
- Familiarity: If you are already familiar with the MMC and comfortable using it for other tasks, it may be more convenient for you to use it for generating a CSR and private key as well.
- Integration: You can use the MMC to manage various aspects of your system, including certificates. This allows you to keep your certificate-related tasks in one place rather than use multiple tools or utilities.
It is important to note that the MMC is just one option for generating a CSR and private key. There are other methods available, such as using the openssl command-line utility or online tools. The choice of which method to use will depend on your specific needs and preferences.
For generating a private key using the Microsoft Management Console (MMC), you can follow these steps:
Steps to Generate Private Key using MMC
Step-1: Open the MMC by typing ‘MMC’ into the start menu search bar and pressing Enter.
Step-2: Click on ‘File’ and then choose ‘Add/Remove Snap-in.’
Step-3: In the ‘Add or Remove Snap-ins’ window, go on the ‘Certificates’ from the list of available snap-ins, and then click on the ‘Add >’ button.
Step-4: In the ‘Certificates Snap-in’ window, click on the ‘Computer account,’ and then on the ‘Next’ button.
Step-5: In the ‘Select Computer’ window, click on the ‘Local computer,’ and then on the ‘Finish’ button.
Step-6: In the ‘Add or Remove Snap-ins’ window, click on the ‘OK’ button to close the window and add the certificates snap-in to the MMC console.
Step-7: In the MMC console, expand the ‘Certificates (Local Computer)’ tree, and then navigate to ‘Personal > Certificates.’
Step-8: Right-click on the ‘Certificates’ folder and click on ‘All Tasks > Request New Certificate.’
Step-9: In the ‘Certificate Enrollment’ window, click on the ‘Next’ button to begin the certificate enrollment process.
Follow the prompts to complete the certificate enrollment process and generate a CSR and private key.
Keep in mind that the specific steps and options may vary depending on your version of Windows and the type of certificate you are requesting. If you encounter any issues or have any questions, consulting the documentation or support resources for your operating system or certificate authority may be helpful.
Using the OpenSSL Command-line Utility
OpenSSL is a widely-used tool for working with SSL/TLS certificates and keys. There are a few reasons why you might choose to use the OpenSSL command-line utility for generating a private key and a CSR:
- Versatility: OpenSSL is available on a wide range of platforms, including Windows, Mac, and Linux, so you can use it regardless of the operating system you are working with.
- Customization: The OpenSSL command-line utility allows you to specify various options and parameters when generating a CSR and private key. This allows you to customize the process to meet your specific needs.
- Automation: You can use the OpenSSL command-line utility in scripts or other automation tools, which can be helpful if you need to generate multiple CSRs and private keys on a regular basis.
- No Additional Software Required: OpenSSL is a standalone tool and does not require the installation of any additional software. This can be beneficial if you do not want to install additional software or if you are working on a system with limited resources.
For using openssl command-line utility do the following:
Step-1: Open a command prompt or terminal window and navigate to the directory where you want to store the files.
Step-2: Run the following command to generate a private key:
openssl genrsa -out private.key 2048Step-3: Run the following command to generate a CSR using the
openssl req -new -key private.key -out csr.csrFollow the prompts to provide information about your organization and the domain for which you are requesting the certificate. This will generate a CSR and private key.
Using Certificate Authority’s Website
There are a few reasons why you might choose to use a certificate authority’s (CA) website to generate a Certificate Signing Request (CSR) and private key:
- Convenience: Using a CA’s website can be a convenient way to generate a CSR and private key, as it allows you to complete the process online without the need to install any additional software or tools.
- Simplicity: Many CAs provide websites with tools that make generating a CSR and private key easy. These tools typically guide you through a series of prompts to provide the necessary information and generate the CSR and private key.
- Security: To protect the private key and ensure that it is kept secure while being generated, some CAs may use additional security measures.
To generate a private key and Certificate Signing Request (CSR) using a certificate authority’s (CA) website, you will need to follow the specific instructions provided by the CA. Generally, the process will involve the following steps:
Steps to Generate CSR & Private Key
- Step-1: Visit the CA’s website and look for a link or section related to generating a CSR and private key.
- Step-2: Follow the prompts to provide information about your organization and the domain for which you are requesting the certificate. This may include information such as your organization’s name, address, contact information, domain name, and other relevant details.
- Step-3: Choose the encryption type you want for your private key. Typically, you can choose between different key lengths, such as 2048-bit or 4096-bit.
- Step-4: Choose the format in which you want to receive the CSR and private key. Some CAs allow you to download the CSR and private key as a file, while others may provide the information in the form of a text string that you can copy and paste into a text editor.
- Step-5: Click a button or link to generate the CSR and private key. The CA’s website will then generate the CSR and private key based on the information you provided.
Follow any additional prompts or instructions provided by the CA to complete the process of generating the CSR and private key. This may include verifying your email address or providing additional documentation.
Keep in mind that the specific process for generating a CSR and private key using a CA’s website may vary depending on the CA and the options they provide. Therefore, it is important to carefully follow the instructions provided by the CA to ensure that you generate the CSR and private key correctly.
So this is how to get a private key from a certificate.
Summarizing
In order to purchase SSL certificate, you need to generate a CSR and a private key and then send the CSR to a CA to request the certificate. The corresponding public key encrypts data, and the private key decrypts it, playing a crucial role in establishing secure communication on the Internet.
A CSR generator tool can save you time and ensure that you complete the process correctly. These tools typically guide you through the process of generating a CSR and a private key. They can help you to avoid mistakes that could compromise the security of your website or organization. It is important to keep your private key secure because anyone with access to it can decrypt data that the corresponding public key has encrypted.
In summary, a CSR and a private key are important tools for establishing trust and secure communication on the internet. Generating these items using a CSR generator tool is usually a good idea because it can save you time and help ensure that you complete the process correctly.