How to Create a Self Signed Certificate in IIS?
Consider this: You’re an IT administrator configuring multiple apps on your company’s network. These apps fulfill diverse functions and are exclusively for internal usage. You want to ensure that the data communicated over the web between these applications is encrypted and safeguarded as part of your security procedures.
But, obtaining cheap SSL certificate from a publicly trusted Certificate Authority (CA) for each application would be impractical and create a massive dent in the organization’s pockets. So, what other options can you use to achieve your goal?
In this situation, employing self-signed certificates will be the best alternative. It will establish secure connections between apps while keeping the encryption process manageable and within the organization’s control.
These certificates can secure the security and confidentiality of transmitted data without relying on other parties.
What is a Self-Signed Certificate?
A self-signed certificate is signed by its issuer rather than a trusted third-party Certificate Authority (CA). As a CA does not sign it, these certificates are not recognized and are even flagged by default in modern web browsers, such as Mozilla, Chrome, and others.
In summary, a self-signed certificate is an SSL cert signed using its private key and is not linked to any intermediate certificate or root CA certificate.
How to Create a Self-Signed Certificate in IIS?
Follow the steps given below to create a self-signed certificate in IIS manager:
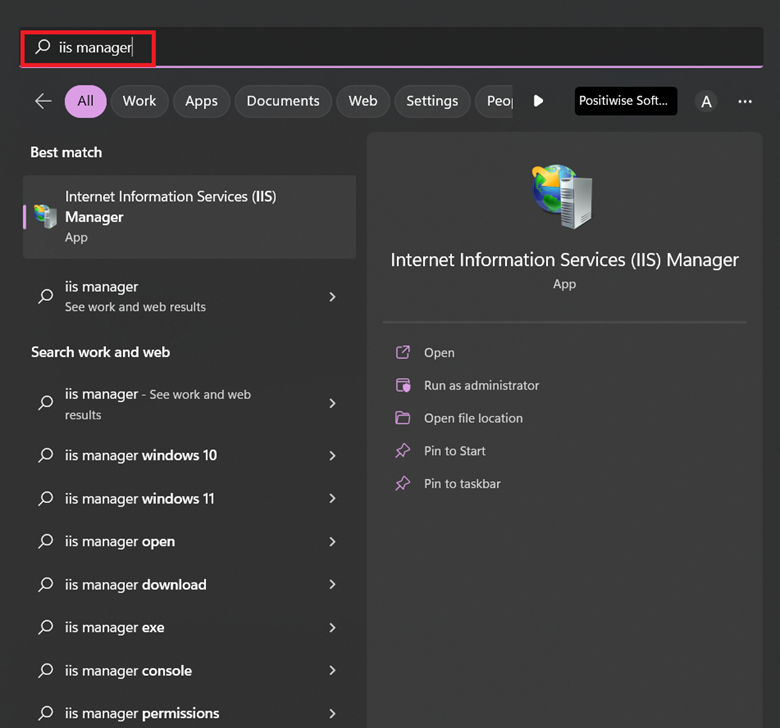
Step 1: Click on Search, type IIS Manager, and press Enter.
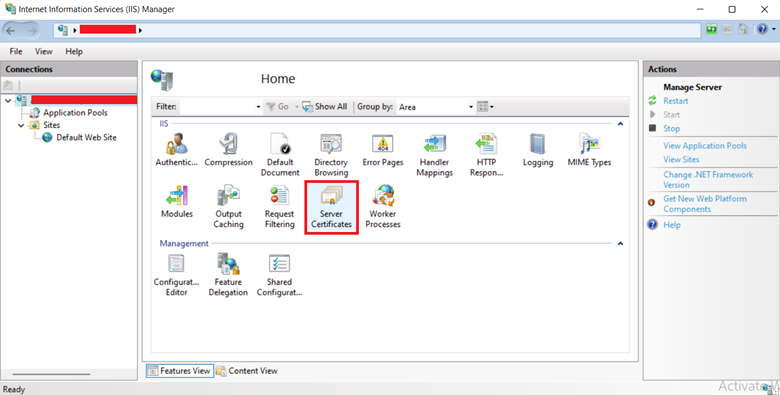
Step 2: Double-click the Server Certificates option in the Internet Information Service (IIS) Manager window.
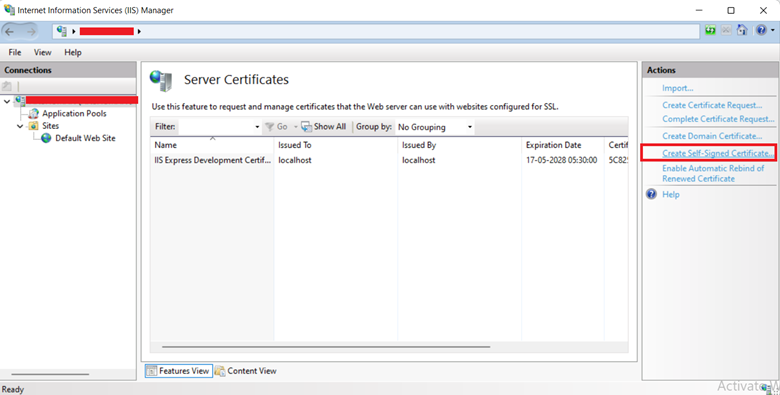
Step 3: Under the Actions section, click Create Self-Signed Certificate.
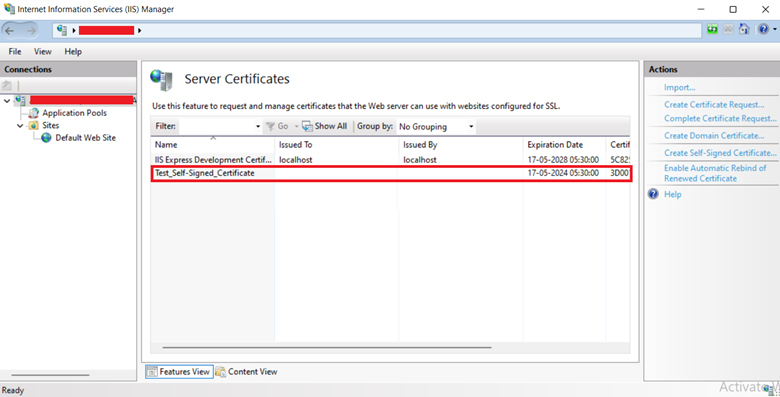
Step 4: In the Create Self-Signed Certificate window, input a name of your choice in the Specify a friendly name for the certificate box. (Example – Test_Self-Signed_Certificate.)

Step 5: Click OK.
Now that we’ve successfully produced one, let’s attach a self-signed certificate to a website.
Read Also: Creating Self-Signed SSL Certificate in Powershell – A Detailed GuideBinding the Newly Created Self-Signed Certificate
Follow the steps given below to bind the certificate:
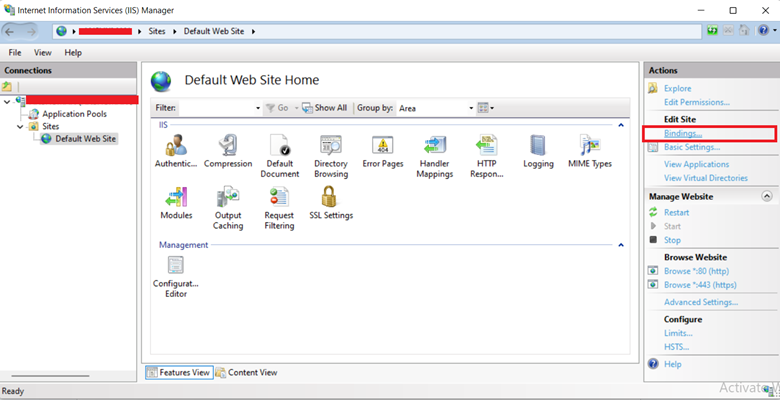
Step 1: Open the IIS Manager, and under the Connection section, expand localhost.
Step 2: Expand Sites and click on Default Web Site.
Step 3: In the right pane, under the Edit Site section, click Bindings.
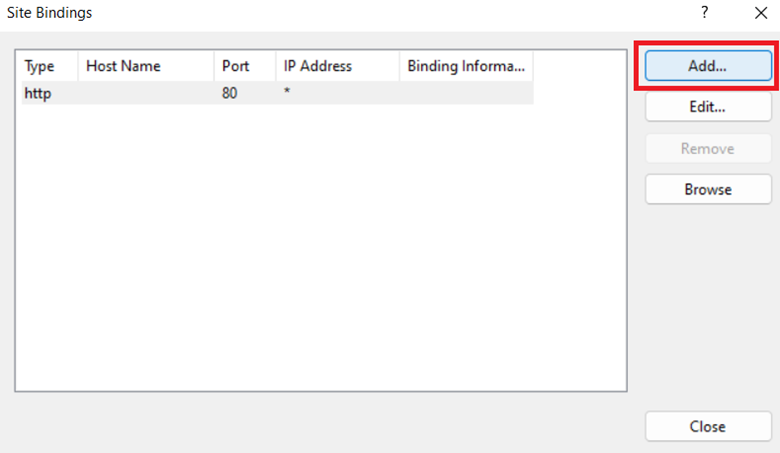
Step 4: In the Site Bindings dialog box, click Add.
Step 5: In the Add Site Binding dialog box, from the Type list, select https.
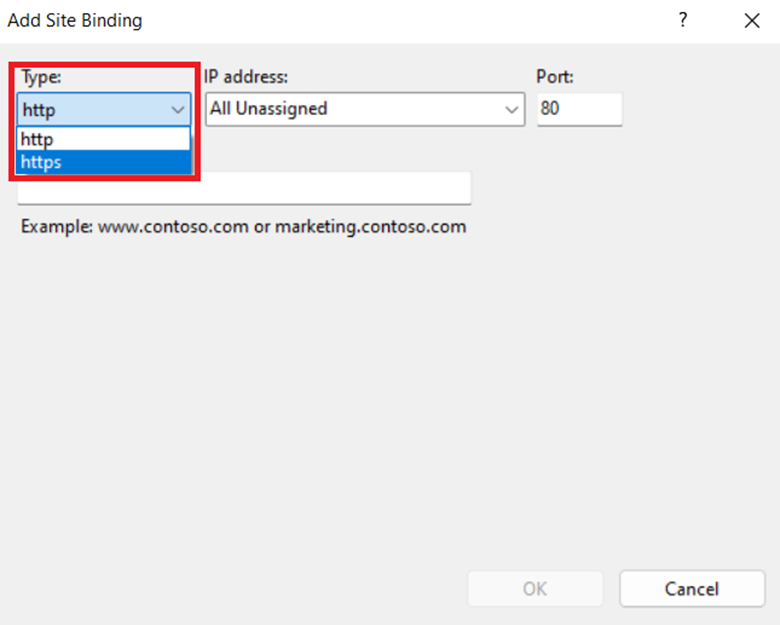
Step 6: Select the self-signed certificate you created earlier from the SSL certificate list. (In this case – Test_Self-Signed_Certificate)
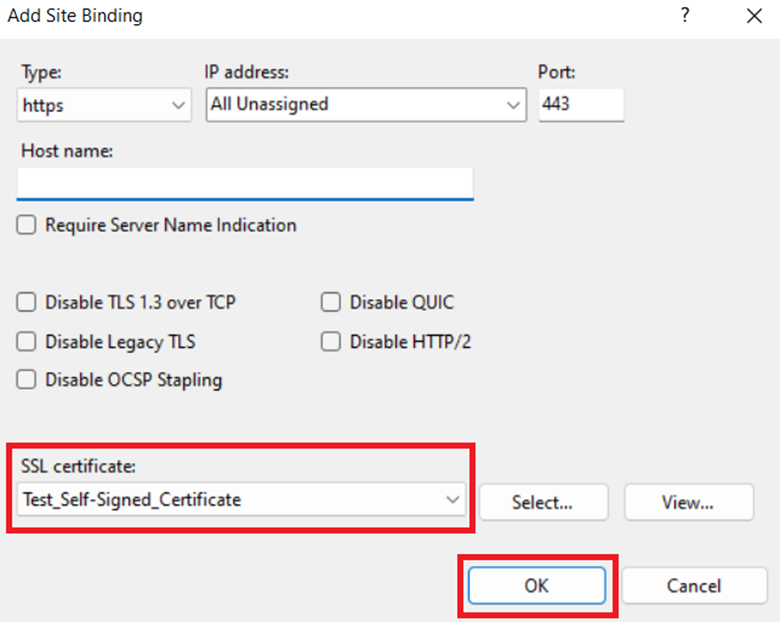
Step 7: Click OK.
Let’s test the website now that we’ve successfully linked the certificate.
Testing the Website for HTTPS
Follow the steps given below to test the website:
Step 1: Open IIS Manager.
Step 2: In the Actions tab, click Browse *:443 (https) under the Browse Website section.
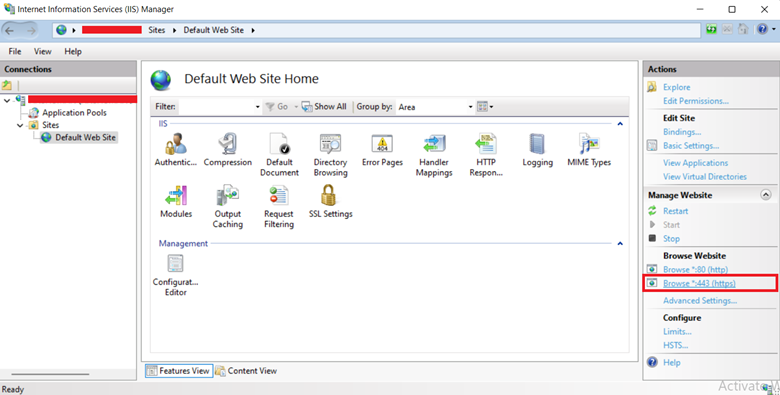
Step 3: A new window in your browser will open.
Advantages of using a Self-Signed certificate
- The issuing procedure is quick and straightforward, saving time for testing.
- It is a low-cost option since it eliminates the need to rely on or pay for certificates issued by a trustworthy certificate authority.
- The certificate can be customized, allowing it to include more metadata or have larger key sizes.
- Ideally suited for testing settings and internal network websites, ensuring secure communication within a limited scope.
Disadvantages of using a Self-signed Certificate
- Lack of trust from browsers and operating systems, resulting in the absence of trust indicators such as the green lock icon.
- Increased user friction due to security warning pages and error messages, negatively impacting website traffic and user experience.
- Heightened risk for transactional or financial-related websites handling sensitive information, making them vulnerable to data theft and cyberattacks.
- Proneness to man-in-the-middle attacks when adversaries create their own certificates.
- Challenges in tracking and managing self-signed certificates lead to a lack of visibility and potential compromise of private keys in case of network breaches.
- Complexity in the revocation process of self-signed certificates, lacking the streamlined procedures for certificates issued by trusted authorities.
