How to Create a CSR on Juniper NetScreen?

Before you proceed with installing an SSL/TLS certificate on your Juniper NetScreen device, a Certificate Signing Request (CSR) must be generated. The CSR has your organization’s details, including an associated public key that the Certificate Authority (CA) will use to issue you a trusted certificate.
In this document, we will show you how to generate a Certificate Signing Request on Juniper NetScreen from the WebUI.
Prerequisites
Before generating a CSR, you must have the following:
- Administrator access to Juniper NetScreen WebUI
- A Valid Purchased SSL Certificate
- The device must have the correct time set, as the SSL certificates require the time to be synchronized.
- Your domain information, including your Fully Qualified Domain Name (FQDN).
- Your organization’s information (official legal business name, city, state, and country).
- Access to a trusted Certificate Authority (CA) or SSL Provider to submit your CSR.
Steps to Generate a CSR on Juniper NetScreen
Step 1: Open WebUI
Open your browser and log in to your Juniper NetScreen WebUI application.
Step 2: Configure Date and Time
- Go to Options > Configuration > Date/Time
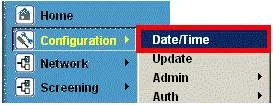
- Click Sync Clock with Client to match the device clock with your computer.
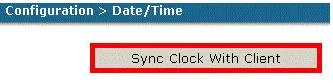
- Be sure to check that automatically adjusting the clock for daylight saving changes is enabled in your system settings. Configuring the accurate time for your SSL certificate is very important.
Step 3: Configure DNS and Host Information
- In the Options menu, go to Network > DNS.
- Enter the internal host name in the Host Name field.
- Enter the Fully Qualified Domain Name (FQDN) (e.g., firewall.example.com) in the Domain Name field.
- Click Apply.

Step 4: Navigate to Certificates
- Go to Options > Objects > Certificates.

- Click New to create a new certificate request.
Step 5: Fill Out Certificate Subject Information
Enter details such as:
- Common Name (CN): The FQDN of your device.
- Organization (O): Your company’s legal name.
- Organizational Unit (OU): Department (e.g., IT).
- City/Locality (L): Your city.
- State/Province (ST): Your state or region.
- Country (C): Two-letter country code (e.g., US, IN).
Double-check all details before proceeding.

Step 6: Generate and Save the CSR
- Click Generate to create your CSR.
- Save the CSR as a text file on your system.

Step 7: Send CSR to CA
Simply copy and paste the CSR text into your SSL Certificate Order form (for instance, when ordering CheapSSLWEB). The CA will verify your information, and then it will issue your SSL certificate.
Once you get your certificate, follow the installation steps to install the SSL Certificate on Juniper Netscreen!
Conclusion
Secure your site today with our low-cost SSL/TLS certificates. From Domain Validation SSL to EV SSL, we have you covered with the best price and security provided by the leading Certificate Authorities. Begin protecting customer trust, improve your SEO, and secure transactions with your purchase today.
