How to Fix Mixed Content WordPress Warnings?
What is the Mixed Content Error in WordPress?
A mixed content error in WordPress is one in which a site is loaded partially with content that is secure (HTTPS) and content that is non secure (HTTP). This issue rarely comes up, but often when a WordPress site has been transferred from HTTP to HTTPS.
Even in SSL-enabled, some of the components such as images, scripts, or stylesheets still can be loaded through HTTP.
Such an inconsistent setup may lead to security notices in browsers that partially or completely brand the site as insecure, which is likely to erode users’ trust and negatively affect a site’s SEO rankings.
This is how a mix content WordPress Warnings on various browsers look like:
Google Chrome:
Microsoft Edge:
Mozilla Firefox:
How to Fix the Mixed Content Error in WordPress?
The warning is often noticed after migrating your WordPress based site from HTTP to HTTPS using an SSL certificate. The reasons that cause mixed content issues are:
- It appears your site SSL is either expired or misconfigured.
- The plugins or themes used on your site call their content through HTTP links.
- Another one is that your site includes static Javascript or media files you obtained over HTTP.
- Your site links to its files using absolute paths (i. e. using full domain name) or hard coded URLs, like http: //www. yoursite. com/image. jpg
WordPress mixed content can be fixed by following the following three methods. which simply involves installing a couple of plugins and having some basic understanding of PHP code.
Find out What are the Causes:
The methods below can be used to examine what is leading to mixed content on the WordPress site.
Check your WordPress Site’s SSL Certificate
It is also worth attributing the mixed content warnings on a WordPress site to an expired or misconfigured SSL certificate.
To know whether your site’s SSL certificate is expired or not, you have to go through your site URL to a particular test site called Qualys SSL Labs. It wiIl provide detailed information on your certificate, including validity dates and general rating.
The certificates you should keep should have an average rating at least of ”A” or ”A+” and a current expiration date.
To perform this test and verify if your site’s SSL certificate is properly configured, enter your site URL in the IONOS SSL Checker site. After completing these keys, the results will depict whether your certificate is installed and configured rightly.
Not Secure warning is also displayed on your browser address bar if your site’s SSL certificate has expired or if it is misconfigured. You will then have to address the ‘Not Secure’ message across your site.
Use WhyNoPadlock?
However, if an expired or misconfigured SSL certificate is not the problem, check your WordPress site’s URL on the WhyNoPadlock? Website In order to get to the bottom of it.
This is the easiest known method as it scans through your entire site and does not need the application of any technicality.
Simply take the entire URL link of your site and paste the same in the WhyNoPadlock? search box , and after that click on the Test Page button.
In some cases, you may be pressed to take a captcha test before you can attempt to test your site. It will display all the villains that have been contributing to your mixed content warnings.
Use the Inspect tool
If you want to find out in a more technical manner the causes of the mixed content warnings in your WordPress site, kindly open your browser and click on any part of your WordPress site then right click, click on ‘Inspect’ on the context menu that will appear.
Go to the bottom and open the Console tab, where you will find all the mixed content warnings.

This is where you can then proceed to tackle every one of these warnings separately. This is possible if there are a few warning signals and in complex cases it will take time.
However, it becomes a tiresome process to go to the next step if there are many warnings, which is why the next section is very useful.
Use a Plugin to Find and Replace HTTP lLnks with HTTPS ones
The easiest way to deal with the mixed content error in the case of the WordPress site is the use of the plugin. For the purpose of the second change, we employed the SSL Insecure Content Fixer plugin which changed all the assets served via HTTP to HTTPS.
Step 1: Download the SSL Insecure Content Fixer plugin and install it / activate it on the WordPress dashboard.
- On your Word-Press admin end, go to the plug-in link on the left side of the panel and choose add new.
- Type SSL Insecure Content Fixer in the search box in the ‘Search plugins…’ textbox to locate the plugin.

- Click on Install and then on Activate to get the plugin up and running.
Step 2: Heading Over to the Plugin Dashboard
- Navigate to Settings.
- In the website link bar, left click on the SSL Insecure Content option.
Step 3: Make your Choice of the Extent of Customization in the Location Fix Insecure Content
The default setting is Simple for most users who should not have to worry about other complicated settings. Nevertheless, you also can utilize the other options if you require additional control for some reason.
Having a look at the options provided in the application’s driving dashboard, it is easy to understand all of them undefined
- Content: It performs a search and repair of all your sites posts and pages, in addition to the activities listed within the Simple option.
- Widgets: It scans all the widgets of your site and corrects all of them, which are beyond the functionalities of the Content option.
- Capture: When selected, it scans all the content on your site as well as headers and footers, scripts, stylesheets, etc., in addition to widgets and other actions.
- Capture All: It searches and fixes AJAX calls on your site, other than the actions encompassed in the Capture option. While it is highly customizable, using it could lead to uneven performance of your site so use it sparingly.
Step 4: Select your HTTPS Detection Options
Fix Plugins and Themes with HTTP Links
It is normally automatically corrected but you might have to do it manually if you realize that the problem is generated by plugins or themes that use ‘HTTP’ links to load their content, by Javascript or media files or by URLs which are hardcoded.
Step 1: It should be verified if the content of plugins/themes can be loaded using HTTPS links
- Using the ‘’Why No Padlock?’’ or the Inspect method will pinpoint the links that your plugins/themes are loading over HTTP links.
- Try upgrading the plugin theme as it may be a solution to the problem at hand. If not, it means that the plugin has become corrupted and needs to be replaced.
Step 2: In the case of themes, convert absolute/hardcoded paths to relative URLs using Theme Editor.
- These are URLs which use the full web address of the site, example: https://www. yoursite. com/blog/blog123/image1. jpg. On the other hand, relative links do not include ‘https’ and ‘www’ terms and instead begin with the path such as. //yoursite. com/blog/blog123/image1. jpg.
- This proves to be one of the easiest ways to detect the problematic links Navigate to the Theme File Editor on the Tools tab in your WordPress admin panel and search for the problematic links.
- Make modifications as indicated above and see if it eliminates the problem as suggested by them.
If these methods do not work, then we need to replace the theme of the work, to a certain extent.
Replace JavaScript and Media file HTTP Links
Step 1: Determine whether accesses to other static JavaScripts or media files can be done via HTTPS links.
- This can also be done by going to the site Why No Padlock or the Inspect method.
- Try replacing the http links of the files with https ones and check if this helps in solving the issue on reloading the page.
- The use of the Inspect method displays the Elements on the browser tab of the active screen. If you click on any of the warnings displayed on the Console window at the bottom, you will be able to see the exact piece of code that is triggering it.
- Scroll down the Console window to locate the mentioned link – it should be seen in the HTML code.
- After finding the link in question, maximize this link and click the right mouse button, then select Edit as HTML.

- Exchange the HTTP at the beginning of all the URLs for HTTPS and click any other part of the website to confirm changes. The respective page will attempt to load the content through the new URL on its own.
Note: You can also try to copy the HTTP URLs and paste them in another tab and try to replace HTTP with HTTPS so see whether it will load the files. This will let you know if the change would turn the wheel or not.
- It is advisable to use this relative path as much as possible to avoid encountering this problem in the future.
Step 2: Check the Entire text in search of any Http links and replace them with Https ones
- Use BetterSearchReplace plugin to install it and activate it in order to use it to perform this action.
- Better Search Replace can be activated from the WordPress admin panel under the Tools tab where you will find the Better Search Replace icon.
- In the Search for box, input the URL of the HTTP site and in the Replace with box input the URL of the HTTPS site.
- Make sure that all tables are selected from the Select tables option when holding Ctrl for Windows or Cmd for Mac.
- Make sure the Run as dry run box is unchecked and click on ‘Run Search/Replace→’.
Force HTTPS
For this step, you will also need access to the server configuration file of your site. Based on the type of server, if your site is on an Apache or nginx server the server configuration file uses . htaccess or nginx. conf respectively.
It is necessary to modify the server configuration file to add code that will force WordPress to redirect clients from HTTP connections to HTTPS links.
This can be done in one of two ways: There are different approaches to transferring files, for example, by employing Secure SHell, or employing File Transfer Protocol refers to.
Please note: Just a word of caution before you get down to it: this is a core file you are dealing with. It is normally advised that one should not edit any core file as this is dangerous but if this is necessary, then should be done carefully since these files are essential in the running of your site.
Moreover, it is recommended to make a copy of your site, files that belong to it, the database it uses before tweaking the . htaccess or the nginx. conf file. After completing each of them, proceed to the next steps.
- This means that the only safe way of editing the . htaccess or nginx. conf file
- From your site host, get SSH login details for your WordPress site and then use command prompt if you are using a Windows computer or terminal if you use a Mac for the following steps.
- Log in to your site’s server by entering the command: ssh user_name@ip_address
Next, you should replace ‘user_name’ and ‘ip_address’ with the data that you got from the web host. Type the password and press enter when you’re asked for it.

- List all files by entering the following command: ls -a

- Locate the file and open it in an editor by entering the following command: vi .htaccess OR vi nginx.conf

- Using vi to open the file for editing, type i.
If you are editing the .htaccess, enter the following lines of code before the file ending:
RewriteEngine On
RewriteCond %{HTTPS} !=on
RewriteRule ^(.*)$ https://%{HTTP_HOST}%{REQUEST_URI} [L,R=301,NE]
Header always set Content-Security-Policy "upgrade-insecure-requests;"
If you are editing the nginx configuration files you have to check the following things listed below enter the following lines of code before the file ending:
server {
            listen 80;
            server_name yoursite.com www.yoursite.com;
            return 301 https://yoursite.com$request_uri;
}- Hit Esc to exit the editing mode and enter: wq to save the changes made and exit the editor.
- Using FTP to edit the file
- For the following steps you are using the same username and password that you obtained for the previous method For uploading and downloading purposes, you should use an FTP client such as Filezilla or Cyberduck. In our case for the Windows operating system we have used Filezilla.
- FileZilla is an open-source FTP solution and can be downloaded and installed on your system.
- We start with opening Filezilla and entering our credentials in the text boxes at the top of the window and pressing Quickconnect.
- Right-click on the site URL of the Remoter site and select to open the root directory of the WordPress installation in the new tab.
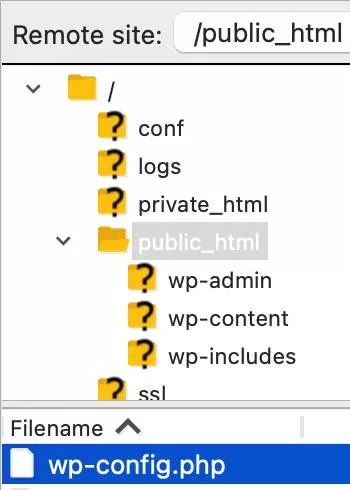
- Find the .htaccess file or the nginx. conf file, right click in the particular file and select the option called View/Edit in order to modify it.

- Append the following lines of code to the similar method used in the previous example: If you prefer an Apache server, you will be editing the .htaccess file;
- if you are using nginx, it will be the nginx. Open the conf file and then close it by pressing the mandatory Ctrl + S if you are a windows user or Cmd + S if you are on a Mac.
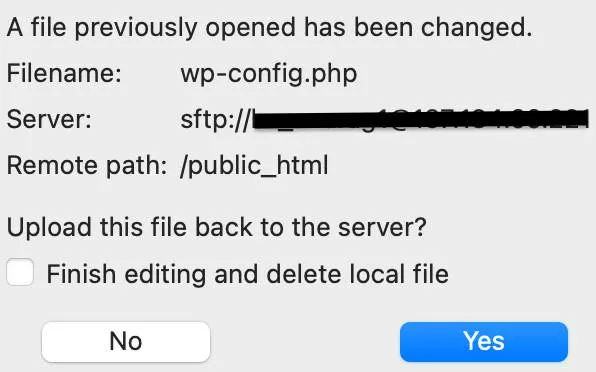
- Click on the File menu and select the ‘Save’ option to close the file editor and trigger a dialog box informing the user that the changes made have been saved.
- There will be another dialog box asking the user if they want to upload the new changes to the server of the WordPress site. As you agree with the modifications, click on Yes to do so and save the updated document on the server.
Test your Site Thoroughly
Check that all the mixed content errors which were in the WordPress site have been eradicated. Always verify every page, every form, media [images, videos, etc. ], and link to ensure all the items are loading with HTTPS links. In case the mixed content warning persists, attempt making amendments with the steps described above.
Here is a post-fix checklist to ensure that your site is performing efficiently:Here is a post-fix checklist to ensure that your site is performing efficiently:
- They include clearing all WordPress, plugin, and browser caches to ensure mixture contents are not held anywhere.
- Take your site and attempt to use it in any other browser but the ones you developed in and do not let the site provide any errors anywhere else.
- To prevent worse scenarios from occurring in the future, it is advisable to have a backup of the site.
Conclusion
If you want to be sure your site is shielded, then use right SSL/TLS Certificate. Keep your site safe and secure with Best SSL Certificates.
